Learning how to sew can be a great skill to add to your repertoire. There are several types of simple stitches you can use for things like mending or sewing basic items. Of course, you can also become a highly talented seamstress if you practice and put in the work. Learning the stitches isn’t too hard, but learning how to end a stitch often throws people off. How do you end that perfect line of stitching and cut it off, knowing that it will hold and look great when you’re done?
In this guide, we will walk you through exactly how to end a sewing stitch. We will cover some different techniques and even different types of stitches. This should serve as a valuable resource to ensure your stitches end just as nicely as they began. Take a look!
You can’t very well really learn how to sew if you aren’t also going to learn how to end your stitches, right? You have to end sewing in order to secure the stitch and keep it in place. This takes just a little bit of technique to accomplish. The good news is that once you know the basics, you can end a sewing project with ease.
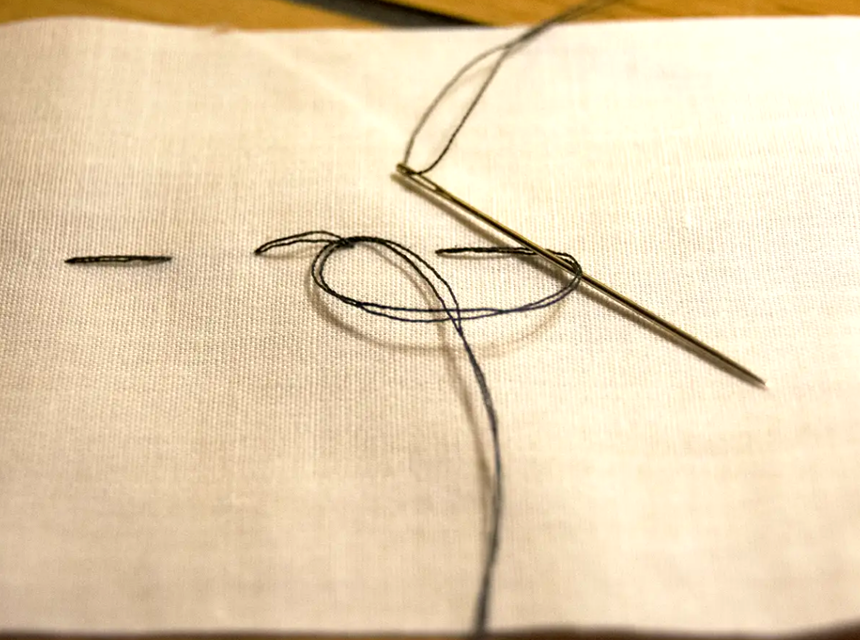
The first option is for a classic stitch Trusted Source Basic Hand Stitching 9 Techniques Every Sewer Should Learn Hand stitching is an essential sewing skill every sewer should possess and master. This basic sewing skill is still very useful for many advanced projects. sewing.com . The classic stitch is just your basic end-over-end hand stitch. It’s the simplest of stitches and typically the first one people learn by hand. To end this stitch, you should just make a knot using your needle and thread. Here is a quick overview of the steps to do so.
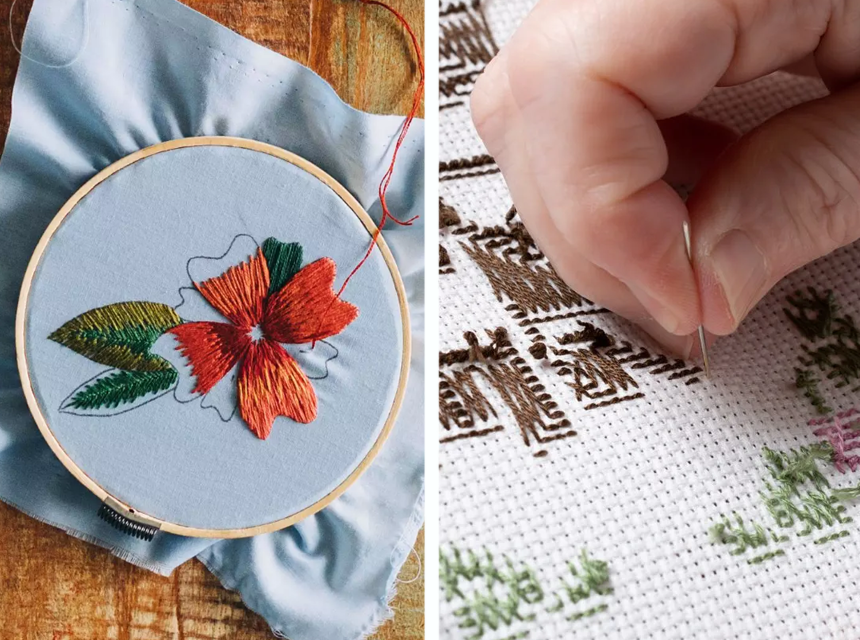
This is often used to end an embroidery stitch as well.
If the classic method to end a stitch doesn’t make you feel confident that your stitch is going to be nice and sturdy, you can always tie off the end of a stitch through the reinforced process. This method is designed to give you a very strong end knot.
Much like in the classic process, you’re going to sew to the last stitch, and you need 5-6 inches of thread. But on this method, for the final stitch, you should begin your needle at the ending spot for your final stitch. It’s almost a backward stitch but in the same spot and style as your other stitches. Make this stitch from back to front, and pull it taut like any other stitch.
Now, repeat this stitch in the exact spots. However, on the repeat, you should leave a small loop, as we did in the classic method. Pass your needle through the loop and pull tight to create an ending knot. Repeat that to create a double knot, and cut off any excess thread left over.
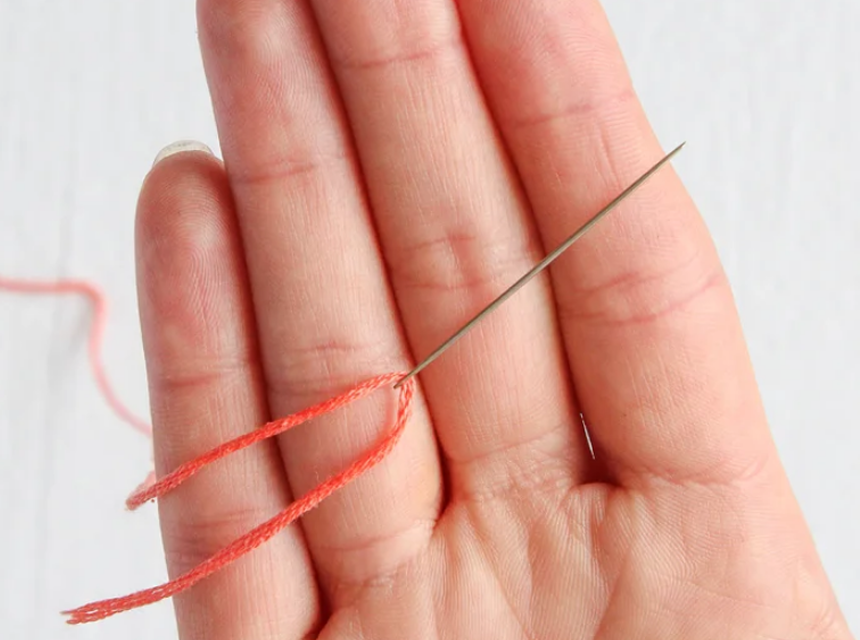
If you want just to tie off the end of a stitch by hand, you can make the tiniest little knot Trusted Source Tying a Knot The Sewing Directory How to tie a knot before sewing, learn more. www.thesewingdirectory.co.uk to do so. Rather than repeating the stitches with needle and thread, you just use your fingers. Here’s the difference between this knot, compared to the other knots. Where our previous knots used double layers of thread that made them larger, this uses a single layer and creates a tiny knot in the process.
Follow these steps to tie off a stitch with this method.
These other knots and processes to end a sewing stitch are useful in many ways, but they don’t always work as well for heavy fabrics. When you use a thick and heavy fabric, you may need to use a reinforced backstitch to best secure your ending stitch. The process will still be similar, but it will add more reinforcement to your project.
Reach the place before your final stitch, and make sure you still have 5-6 inches of thread. Now, instead of moving forward, go slightly backward, about halfway through your prior stitch. Then push your needle forward to the location where your final stitch needs to end. Leave a little bit of thread to leave a closing loop here.
Now, you can pull the needle through your loop and gently pull it into a knot. Repeat this in the exact same spots to create a double knot on the thread, which will hold it securely. Now, you can cut your excess thread.
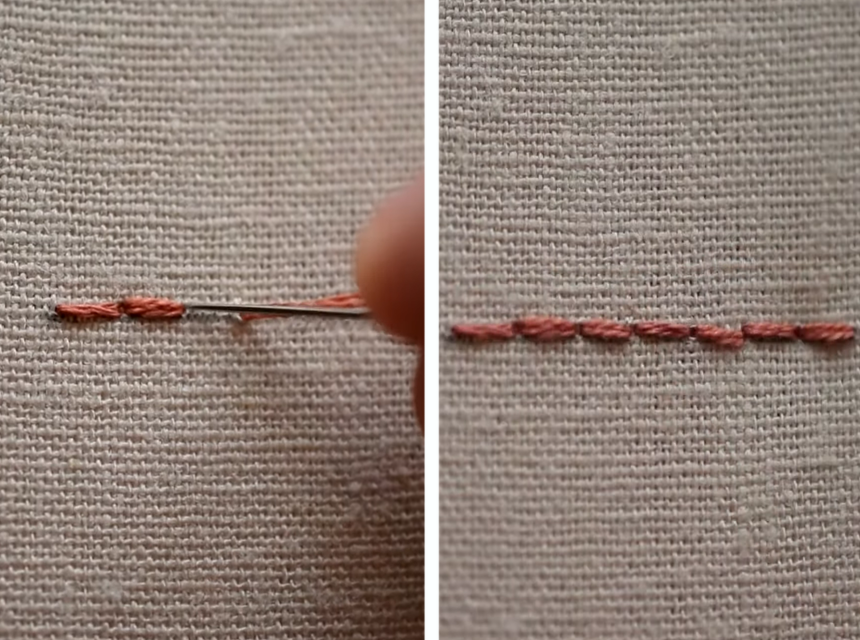
A quick finish for ending a cross stitch or perhaps ending a crochet stitch is the simple knot. This is one of your simplest moves, and it works well for something quick but reliable. Sew until you reach your final stitch, leaving some thread to create the knot.
Now, simply make a circle with the thread that you can put your finger in. Hold the thread open, pass the need through, and close your note. Pull up on the thread until it closes. This works best if you are also holding the thread with your finger so it stays in place and close to your material. Repeat the same steps to double the knot and make it secure.
Next up, what if you’re using a hand stitch that just has a single-threaded needle? Your processes are going to look very similar, and you can choose what you are most comfortable with. The good news is that these processes are almost the same as if you had a double-threaded needle, but they just won’t be as thick in most cases.
These are the types of stitches you can use to tie off the end, which you will find are the same for a double-threaded needle.
However, there is one more popular choice. This is a top choice to end cross-stitch projects. At the end of your row of stitches, simply bring the need back over your last stitch, similar to a backstitch. Insert the needle behind this stitch, and leave a loop. Run the needle through the loop twice in a row, and then tighten the loop the second pass. This gives you a tight and secure finish that is small and simple.
When you want to tie off a double-threaded needle, you can use any of the processes we have shared above to do so. The first method is to simply tie it off, just like the steps we just shared with a single thread. The only difference is that your knot will be slightly thicker because you have more thread in place.
With double thread, you can also simply tie off the knot by hand. Remember that this method requires you to leave several inches of thread to do so. You cut the end of the thread, remove the needle, and tie your knots. Don’t forget that you won’t want to pull them so tight that they cause your fabric to bunch up.
Burying the thread is a method that is often used in conjunction with another tie-off or knotting method. Burying the thread simply adds some extra reinforcement so that it’s less likely to pull loose if your fabric maybe gets a ton of movement.
So, you start by making your knot of choice. The ending knot is really up to you, so feel free to use any of the methods we have shared for this above. Your fabric needs to have layers.
So first, tie the knot at the end as you choose. Then, insert your needle into the fabric between layers. Pull the needle and thread through at this point, and clip your thread off. Do you have good scissors that you use for clipping and sewing? Users say these fabric shears are a great choice for every sewing project.
Now, if you don’t have multiple layers to be able to bury the thread, you can also just weave the thread.
Just like the other process, you need first to tie your knot of choice. Then, you can weave any remaining thread back through about 4 stitches prior to the knot. Pull the thread to reduce excess. Then weave it back through from the opposite direction, towards your knot. Now, you can clip the thread.
A backstitch is common in sewing, and the most popular way to end a stitch is with a sewing machine. You can use it by hand, too, though. You can use the backstitch to avoid leaving any lumps from a traditional knot.
To make a backstitch, work from the backside of the fabric. Insert the need where the previous stitch ended. Then, bring the needle back up, behind the last stitch, somewhere before it ends. Now, pull the thread through, and this creates a lock in the stitch. You can cut the thread and finish.
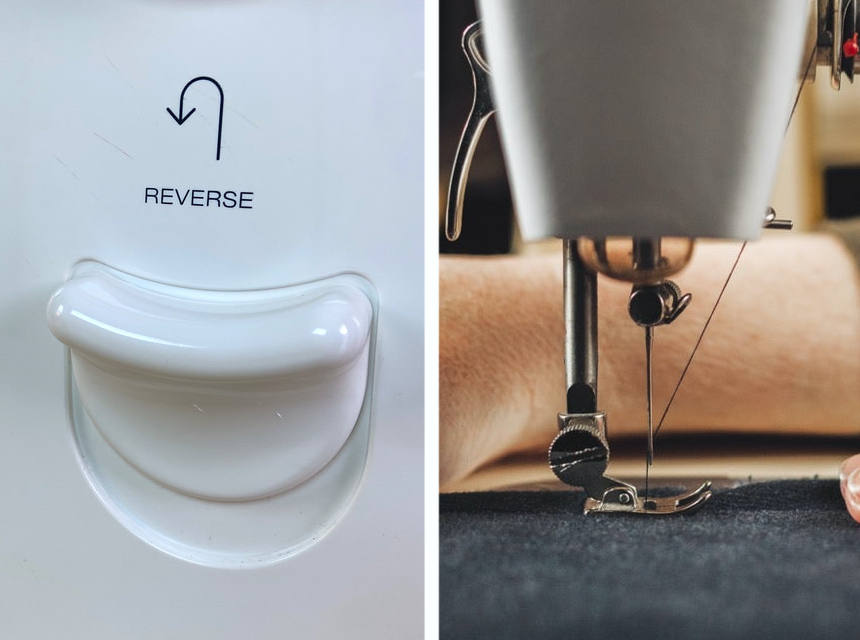
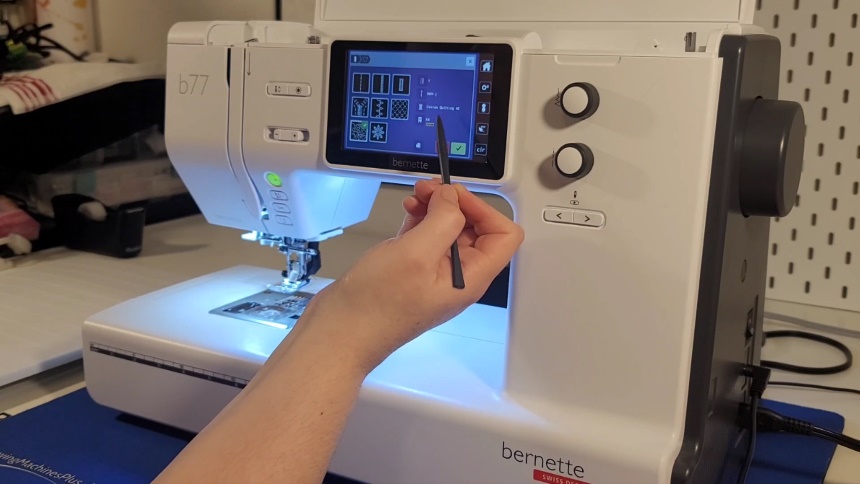
On the sewing machine, your machine does most of the work for you. However, you still have to know how to do it properly to make sure it looks awesome when you finish, right? The easiest way to end a stitch is by using your reverse button on the sewing machine.
To do so, place your fabric under the presser foot, and ensure it is properly aligned with your seams on the guide. Then, press the reverse switch and power the machine to create 3-5 stitches in this motion. Then, move the machine forward again in the same spot. This should create a layer of three stitches atop each other. Now, cut your excess thread and admire your work.
Using the right needles for your project will make a difference with the stitch as a whole. Make sure you use a high-quality needle that matches your fabric, much like some of these options – Klasse Topstitch 8012 Ndl6.
To end an embroidery stitch, you often want to avoid bulky knots because it really makes the backside of your project far too busy. So instead of using the knots, you are going to work with the thread on the backside of the project. Run the needle under the thread of the last few stitches that you have, and leave a small loop. Pull through the loop and tighten slightly. Then cut your excess thread to finish.
In knitting, you’re working continuously rather than on a piece of fabric. So your process to end a knit stitch will look just a little bit different. To end your stitch, begin a new row, going 1-2 stitches to do so. Keep those loose. Now, cut off a tail on the yarn. Wrap the tail around your needle and pull your other stitches over the tail. Then pull to tighten, and you have a secure knot to end your stitch.
If you want to end a running stitch, it’s not too complicated, but you want to be sure you aren’t leaving behind visible knots. So instead, work from the backside. Simply slide your needle under the final stitch that you made and make a loop with it. Then, repeat and make another loop to create a double knot. You can do this a couple more times to make it secure, then cut the thread.
To end, a crochet stitch will be somewhat similar to knitting because you rely on your loops and your needle. At the last stitch, leave the loop on your hook. Then, proceed to wrap the yarn around the hook with that loop and pull it through the loop. Pull until tight to create an ending stitch.
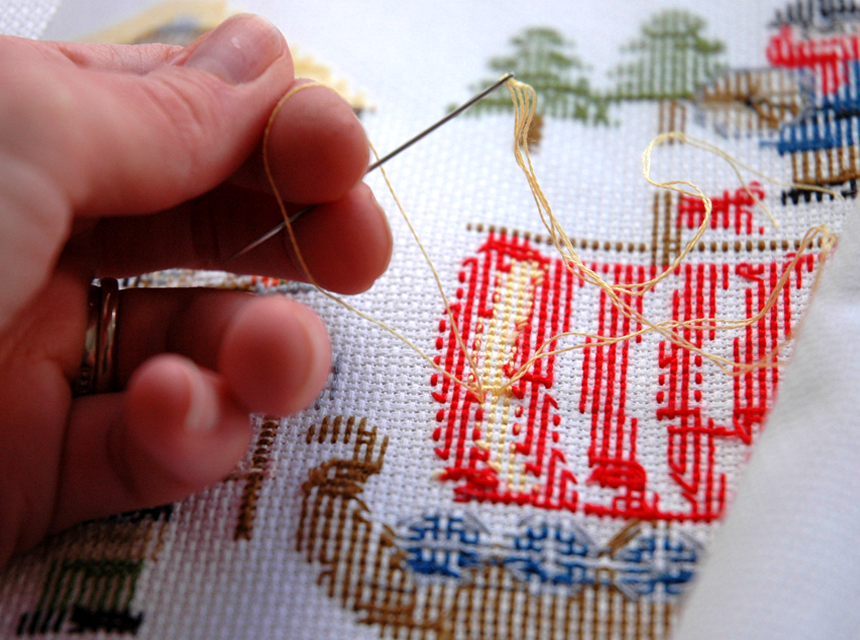
Cross-stitch endings should be treated nearly the same as your embroidery endings. You will want to follow a similar pattern to help prevent your knots from being visible on the front side of your project. Simple tie into some of the thread on the backside, and loop your needle through to create a final ending that locks into place.
Box stitches are more common in creating things like bracelets or lanyards, but they still must come to an end, right? To end a box stitch, don’t tighten the last stitch. Then, wrap a strand of color around it on one side and a strand on the opposite side too. Bring the strands together and up through the middle of your last stitch. Pull those strands tight to secure and cut off any excess.
It’s simple to end a ladder stitch. As you finish your stitch, simply insert the needle under the very last stitch and come back up and out. Pull the thread tight in that spot to create a knot. Then repeat once or twice in the exact same spot, and cut off excess thread.
Learning how to end a stitch isn’t so hard when you think about it. Many of the processes are very similar, and most of them use either a backstitch or a knot of some sort to help secure the end of your thread. While the processes may vary slightly for certain projects, you can rely on just about any of them to give you a tight and good-looking finish. Just be sure that you’re careful about where and how you secure, so you don’t end up with a bulky knot or finish that doesn’t look right.
If you keep the finish line in mind, your project is going to look great!