When you first begin learning to sew, you are going to hear the word seam thrown around quite a bit. Most people have a basic understanding of what a seam is, after all, you see them constantly in your clothing.
Seams are the part of clothing where two or more pieces of fabric are sewn together. Seams are what enable us to create clothing.
However, different types of seams can be used depending on what you are trying to sew. It is important to know how to recognize the key differences and the uses of each, that way, when you begin your project, you use the correct seams.
In sewing, a seam is a part where two different pieces of fabric come together and are joined together using stitches.
There are two basic types of seams, open seams and closed seams. It is easy to recognize the difference between these two types of seams if you know what you’re looking for.
An open seam is a seam where you are able to see the seam allowance. The seam allowance is the area between the fabric’s edge and the seam’s stitching. Sewers will typically use this type of seam on projects where they know the seam will only be visible from the inside of the clothing.
A closed seam is a seam where the seam allowance has been incorporated into the seam and concealed by the seam finish. If done correctly, this makes for a smooth, professional-looking seam that will be comfortable for the user, in case of clothing, to wear.
In sewing, there are many different types of sewing seams. Each is designed to look a certain way and to be ideal for certain fabrics. Understanding the different types of seams available to you is important because it will allow you to make neat, professional-quality projects and pick high-quality clothes Trusted Source From rubbing fabric on your neck to checking stitch size, there are ways to test how well made clothes are before you try on. www.theguardian.com .
Different seams also have different levels of durability. This is especially important to understand if you are trying to stitch a seam that will be put through a lot of stress. You want to make sure that it is strong enough to handle that stress.
In this section, you’ll be able to see different types of seams with pictures so that you can learn to identify them.

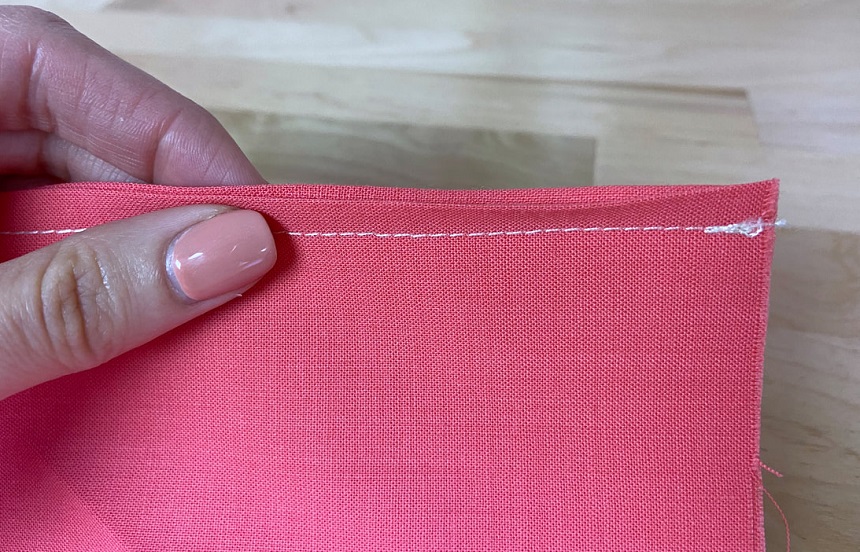
A plain seam is the most basic type of seam that you can sew. To sew a basic seam, you’ll take two pieces of fabric and sew them together with a single line of stitches Trusted Source Seam sewing Wikipedia Seams are finished with a variety of techniques to prevent raveling of raw fabric edges and to neaten the inside of garments. en.wikipedia.org . You’ll also leave some seam allowance on the fabric.
Plain seams are best used for projects where you know that the seam is going to be on the inside of the garment. An example of this is a t-shirt. With a t-shirt, you can simply sew the seams on the inside of the shirt then, when turned right side out, you won’t be able to see the seam allowance.

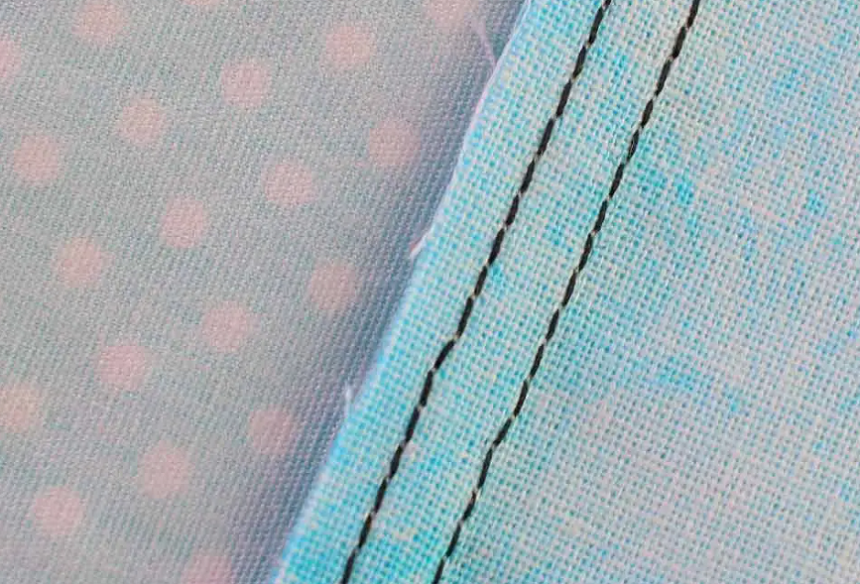
A double-stitched seam is extremely similar to a plain seam, just more secure. With a double-stitched seam, you will sew an additional row of stitches between the original plain seam and the edge of the fabric. This will make it so that the seam is extra secure, and you won’t have to worry about it pulling loose.
Just like with the plain seam, this seam is good for projects where the seams will be hidden or when functionality is valued over aesthetics.

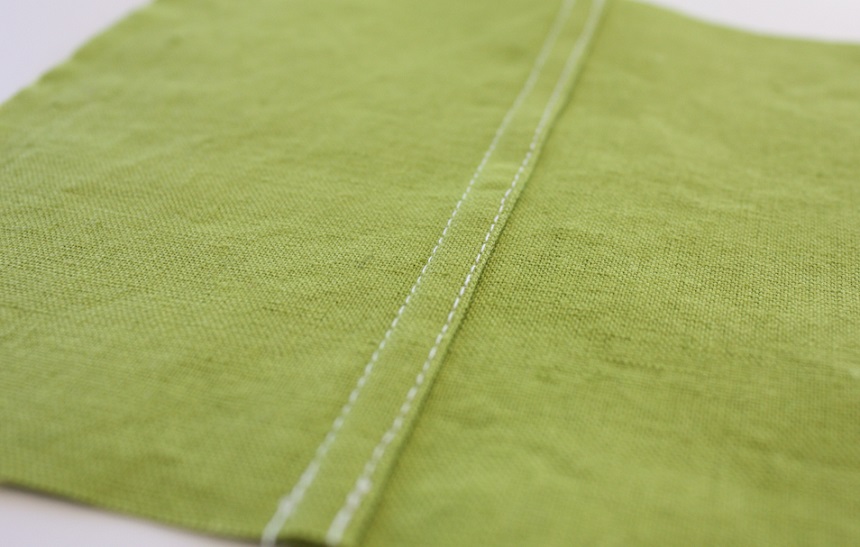
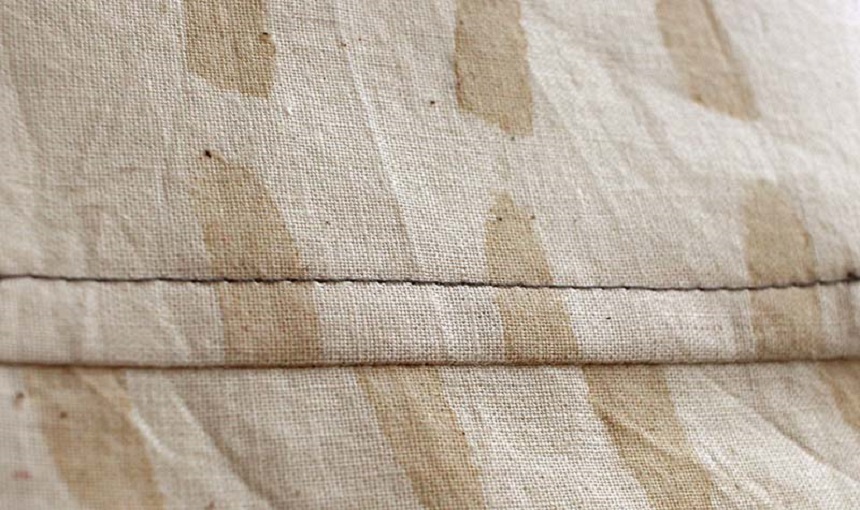
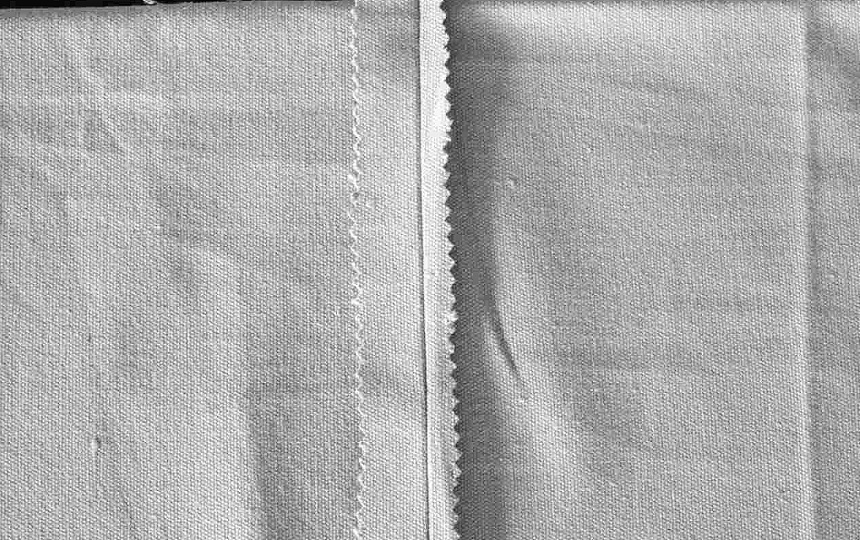
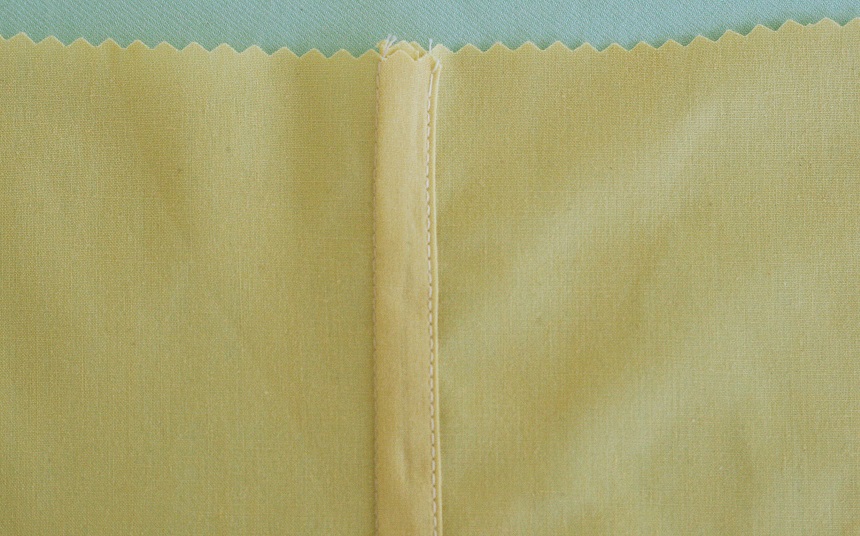
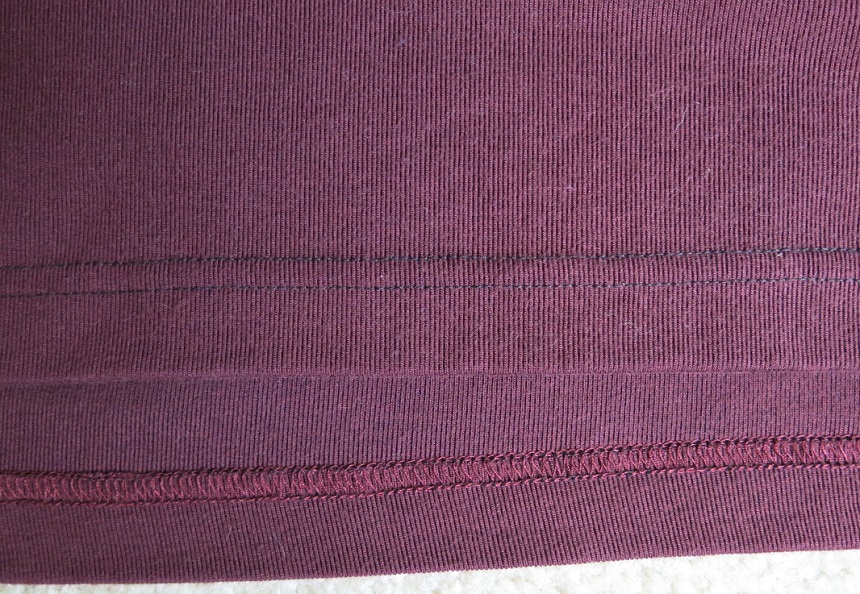
A top-stitched seam is a seam where rows of stitches are stitched into the fabric on top of the seam. This helps to hold the seam in place as well as keep any seam allowance from moving around inside of the garment, which helps to make it more comfortable.
Top-stiched seams are also used for decorative purposes. Most jeans have topstitching, which is single rows of stitching, often in a contrasting color that is visible from the outside of the garment.
A French seam is a seam that sews the fabric allowance into the seam on the inside of the fabric. This seam is completed by sewing a plain seam on the opposite side of the fabric so the fabric allowances are showing, then folding the fabric again and adding another line of stitches to cover the original seam’s fabric allowances.
This type of seam only works on straight seams. The benefit of this seam is that it makes the seam more comfortable by making the seam smoother. It can also make the seam appear neater since you won’t have fabric edges sticking out.
A mocked French seam is very similar to a regular French seam but is easier to apply in instances where the seam is curved.
To complete a mock French seam, you’ll fold and iron the fabric allowances in until the raw edges are completely tucked in. Then you’ll sew them in place with an additional line of stitches.
To sew a flat-felled seam, you’ll first sew a basic, plain seam on the right side of the fabric. That way, you can see the seam from the outside of the garment.
Then, you’ll press the seam into place and trim one of the fabric allowances. After that, you’ll take the longer seam allowance and tuck it over the shorter to conceal it. Once that is done, you will stitch everything into place.
Flat-felled seams are best for garments like work clothes where you want to reduce the contact your skin has with the seam as well as make durable clothing.
To sew a welt seam, you’ll sew a regular seam with the right sides of the fabric facing together and finish the edges. Then you’ll flip it around and sew an additional seam from the outside of the fabric to hold the seam allowances in place.
A double welt seam is just like a regular welt seam, except you’ll add an extra topstitch seam to the right side of the fabric to make the seam stronger.
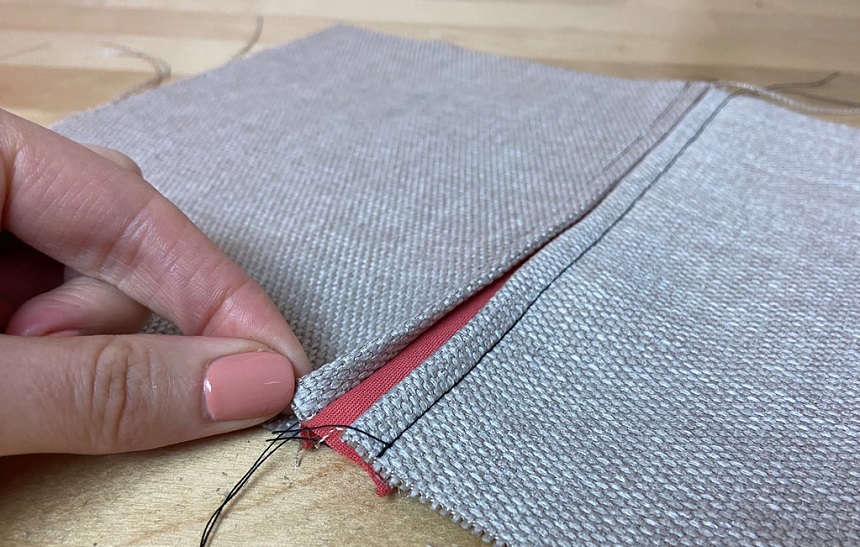
A slot seam is a decorative seam. To make one, you’ll bring two hemmed pieces of fabric together, and instead of sewing them to each other, you’ll sew them to a contrasting piece of fabric. That way, when the fabric moves, you’ll see the contrasting fabric peaking out from the slit between the two original pieces of fabric.
This is not a very durable seam, so that’s something to keep in mind when deciding whether or not you’ll use it in your design.
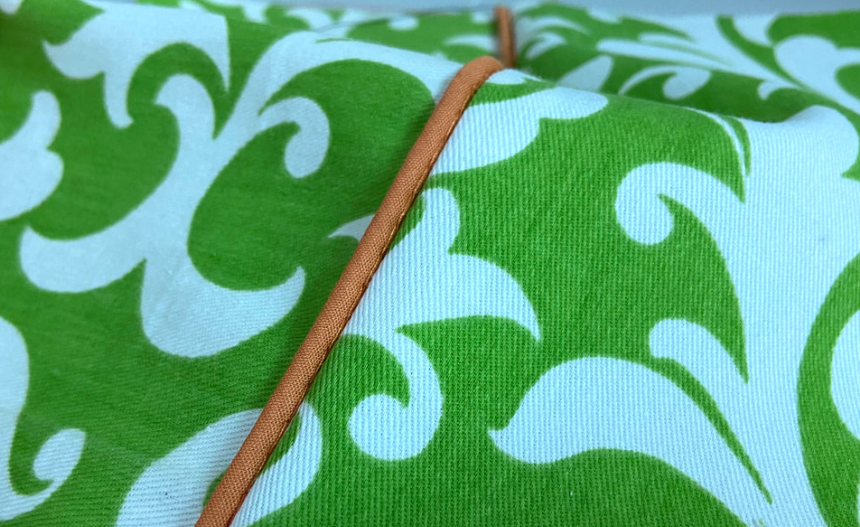
A corded seam is a decorative seam where you place a tubed fabric or trim into the seam of the fabric. This is easily done on a seam. When you’re stitching the fabric together, you’ll also stitch in the fabric of your trimming. Then once you’ve stitched it and flipped it around, you’ll have decorative trimming along your seam line.
Decorative seams are any seams that add additional features to make the seam prettier from the outside. The previously mentioned corded seam is an example of a decorative seam.
A graded seam is a seam where one of the seam allowances is trimmed, and then the other is pressed over it to create a tiered effect.
A hand-stitched seam is any of these listed seams, just stitched by hand.

A piped seam is created by sewing a narrow strip of fabric into a tube and then sewing that into the seam to create a trim. This can help to emphasize the lines of the garment and is considered a type of decorative seam.
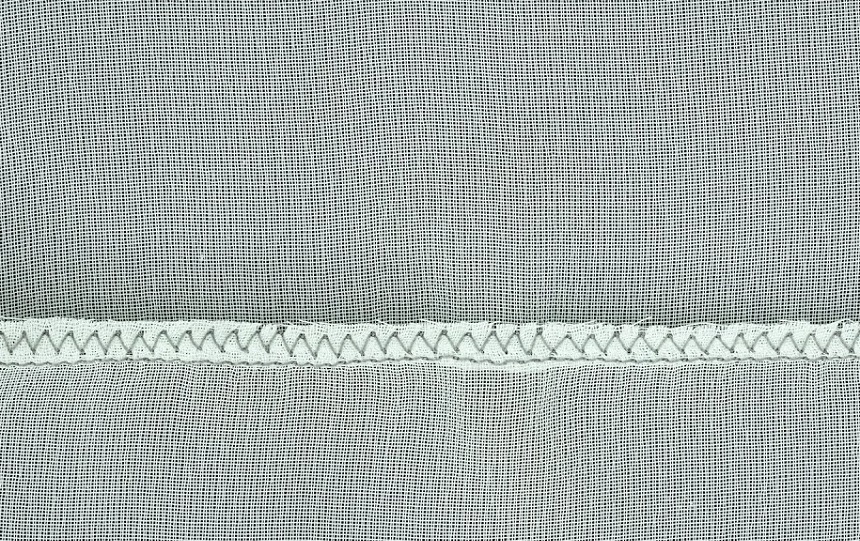
A hairline seam, as the name suggests, is a very thin seam with little to no bulk. This is achieved by trimming the seam allowance as short as possible. It is typically trimmed to the width of the stitch. You’ll then use a zig-zag stitch to secure the seam and what little fabric allowance is left.
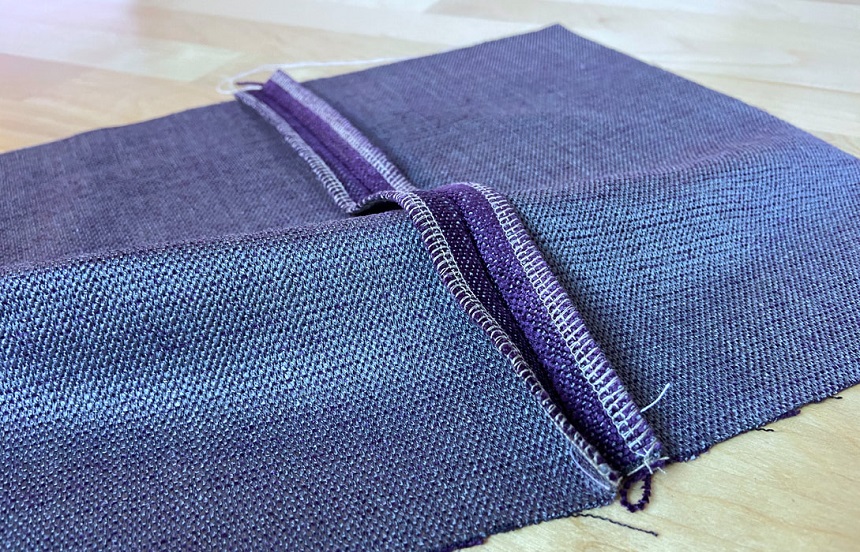
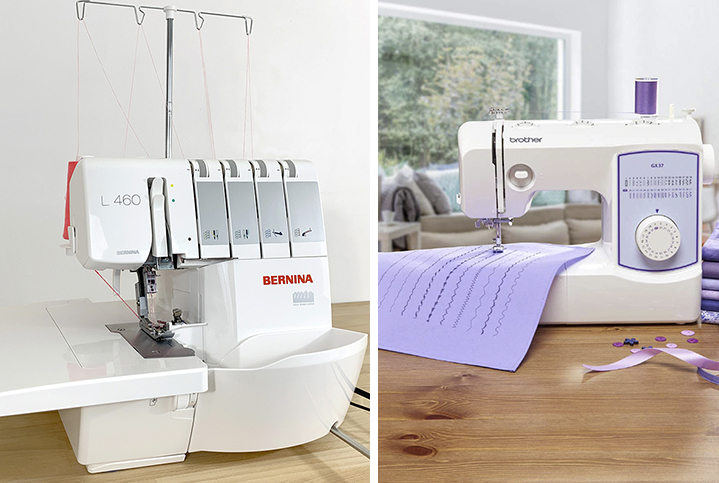
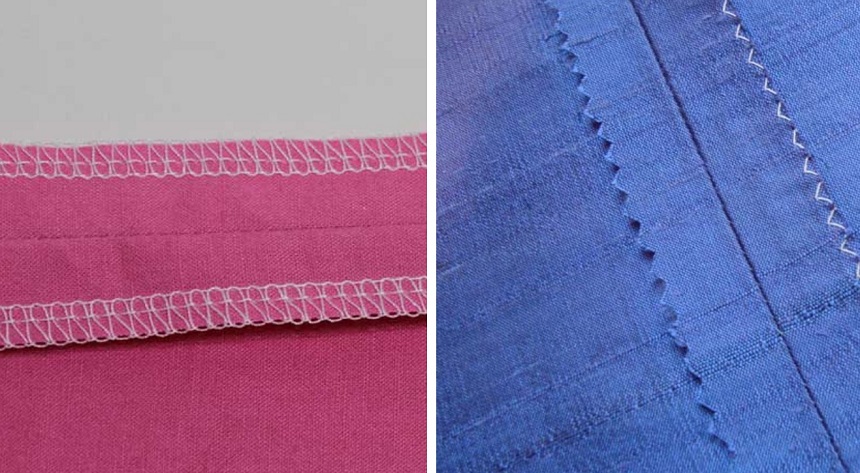
A serged seam is a seam that uses an overlocking stitch. This is one of the few seams on this list that cannot be done by hand or with a regular sewing machine, it must be done with a serger.
A serger is a sewing machine that uses anywhere from 3-5 threads at once to sew seams, finish fabric edges, and trim fabric allowances at the same time.
The benefit of a serged seam is that it provides a professional, neat, and durable seam. They are also able to sew significantly faster than a regular sewing machine.
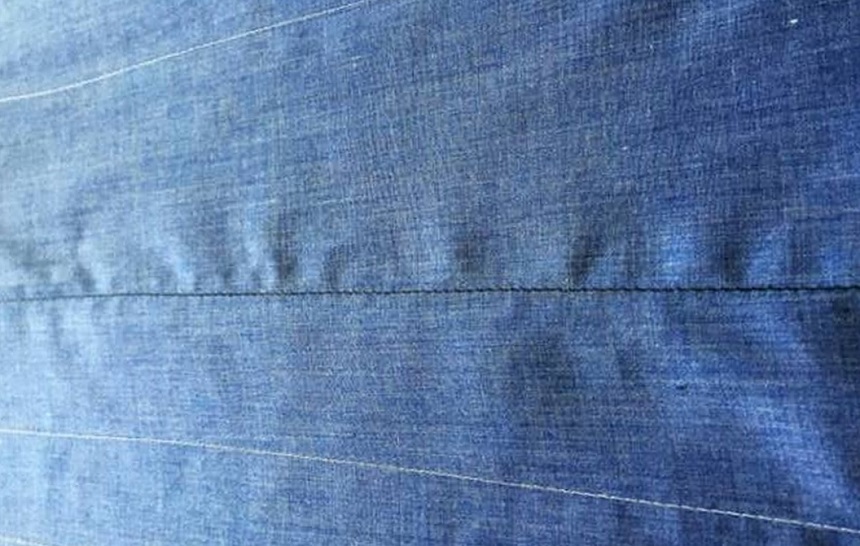
A puckered seam is a seam where the fabric has been sewn too tightly at some point. This causes rippling and bunching in the fabric.
There are many different reasons why the seam could have been sewn too tightly. It could be due to the needle you’re using, the thread, the shape of the seam, or, if you’re hand sewing, uneven tension on the fabric while stitching.
To correct this issue, you’ll need to experiment to figure out which factor has caused your puckered seam so you can get it corrected.
A hemmed fell seam is sewn on the right side of the fabric. Then one seam allowance is trimmed short while the other is kept long. The long seam allowance is then folded over the other and stitched into place with fine stitches.
This ensures that the inside of the garment is smooth, which makes it a great seam if chafing is a concern.

A butted seam is one where the edges of the two fabrics being sewn together do not overlap with each other. Instead, they are lined up the edges are just touching and sewn together using zig-zag lock stitch or chain stitch.
These are frequently used in underwear where bulky seams want to be avoided as much as possible.

Taped seams are waterproof seams that are most frequently used in outdoor clothing. If a seam is not waterproofed, then water can penetrate the clothing via the holes created by the stitches.
To waterproof the seams, a machine will melt tap over the seams. This will seal the holes and effectively waterproof the seams.
When you are sewing a seam in linen fabric, you must finish the edges of the fabric. Linen is especially prone to fraying and will not do well with seams where you do not finish the fabric.
Some of the best seams for linen include French seams, flat felled seams, and serged seams.
A counter seam is ideal for heavy fabrics where the bulk of the seam is relatively unimportant.
To sew this seam, you’ll take the two fabrics, fold the edges, then bring them together so the folded edges hook around each other. That way, the raw edges of both pieces of fabric are folded into and stitched into the seam. This also makes for a very durable seam.

A lapped seam is one of the best seams to use when you’re dealing with extremely thick, inflexible materials such as leather.
For this seam, you won’t be doing any folding. You’ll simply lay one of your pieces of material over the other with your chosen seam allowance. Then you’ll use at least two lines of stitches to stitch the pieces together.
With this seam, you’ll be able to feel the joining of the fabrics, but you’ll be able to avoid the added bulk that comes with attempting to fold thicker materials.
The English stitch seam is a type of seam where you use four pieces of fabric, two main pieces, and two lining pieces.
To sew this seam, you’ll pass the needle through the first three pieces of fabric, then leave out the fourth. Going back the other way, you’ll include the piece of fabric that you left out but then leave out the first piece of fabric on the other side.
Sewing the seam this way allows the fabric to lie flat when opened despite consisting of four individual pieces. It also allows the fabric’s raw edges to be concealed between the layers of the fabric. That way, you don’t have to put in additional work to conceal the edges of the fabric.
In this section of the article, you’ll learn about the seams and stitches in garments, especially the different types of seams and seam finishes that you can use.
Each of these different types of seams is ideal for a different purpose and will be used in different types of garments.
The superimposed seam is most commonly used on the top side of garments. It is used to sew multiple pieces of fabric together and can be used in conjunction with plain seams, French seams, and double machine seams.
A lapped seam is where the fabric allowances are folded and then hooked together before stitching. This type of seam is only used in situations where the bulkiness of the seam is not as important. In clothing, it is most typically used in jeans.
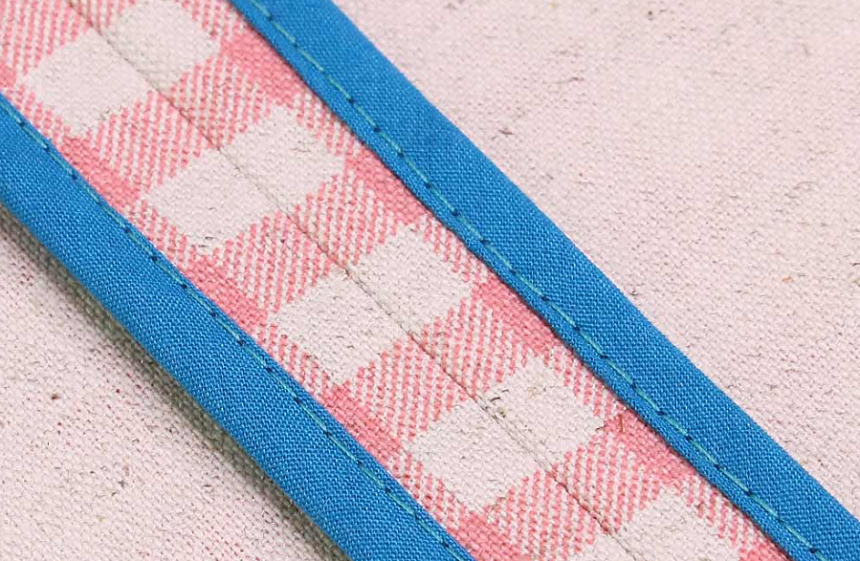
Bound seams are seams that are held together by a strip of fabric. The two pieces will be lined up, and then the edges will be covered by a thin strip of fabric. The strip of fabric will be stitched to the original pieces of material to hold them together. This helps to minimize the bulkiness of the seam.
The strip of fabric can also be a contrasting color to help emphasize the lines of the garment.
A flat seam is a seam where the edges of the fabric do not overlap. Instead, they are lined up to each other, and then cover stitches are used to sew them together. To do this, a sewer would typically use something known as a coverstitch machine.
Ornamental stitching is stitching that is done on a single piece of fabric, following a decorative pattern.
There are multiple types of stitches that you can use to finish the edges of the fabric. Some of the most popular edge finishing stitches are the zig-zag stitch, the serged stitch, and the edge stitch.
An applied seam is mainly used to apply decorative materials to the edges of a fabric or seam.
A hand stitch is any type of stitch that is done by hand as opposed to being done with a machine. Many different types of seams and hems can be done by hand.
Some of these stitches include the running stitch, catch stitch, blanket stitch, whip stitch, and ladder stitch.
A lock stitch is a common stitch done by sewing machines. It works by using two threads that twist or “lock” together every time they go through the fabric.
A coverstitch is primarily used on knit fabrics. Just like the zig-zag stitch, it is flexible, which helps to prevent stretchy fabrics from puckering or pulling.
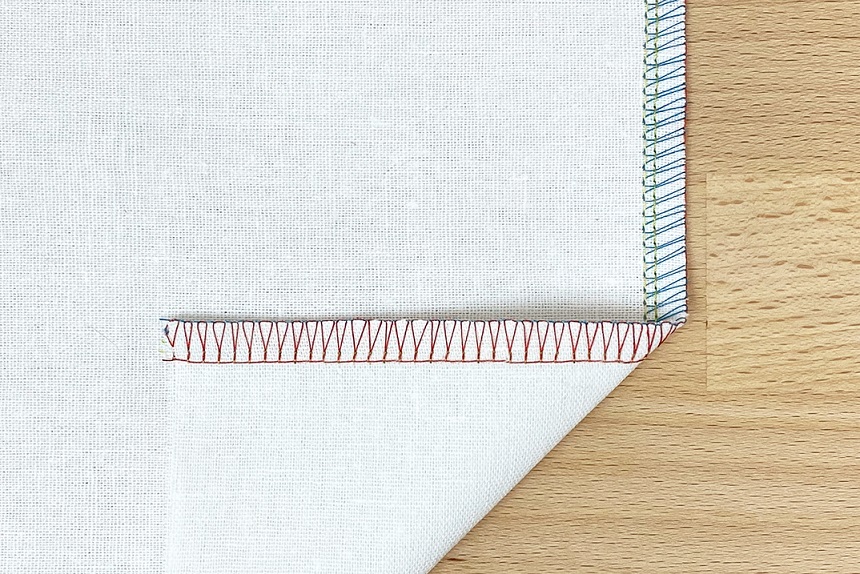
An overlock stitch is a type of stitch that requires multiple threads and can only be done using a serger sewing machine. This type of stitch sews over the edge of the fabrics to help finish the edges.
Most serger machines will also trim the fabrics as they sew the overlock stitch, which can help you save time that you would have used trimming the excess fabric off each seam.
A single-thread chain stitch is a weak stitch made using just one thread. It is not strong enough to hold up over time, so it is typically used for temporarily holding the fabric together while other stitches are being made.
A multi-thread chain stitch is done using two threads at once and is most frequently done by sewing machines. You can usually find this stitch used in the inseam of jeans and the side seams of shirts.
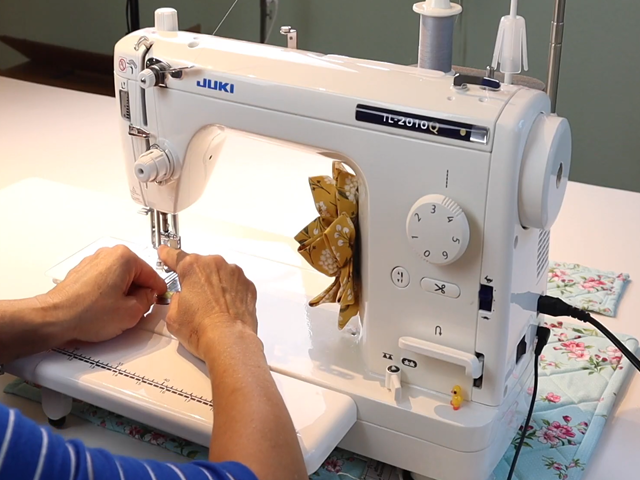
One of the most popular sewing seam techniques is using a serger. A serger is a sewing machine that is exclusively designed for sewing seams. It is able to sew the seam, finish the raw edges of the fabric, and trim the fabric allowances thanks to its cutting knife.
Sergers can typically stitch up to 2,000 stitches per minute which has the potential to save you hours of time sewing seams. Especially if the project you’re working on requires lots of seams.
Using a serger will also give you more professional, neat-looking seams than you can achieve sewing by hand or with a regular sewing machine.
If you are interested in purchasing a serger for your next project, two of the best serger sewing machines in the business are the Elna eXtend Easy Cover Coverlock Serger Machine and the Singer 14HD854 Heavy Duty 4 Thread Serger With Differential Feed.
The Elna, in particular, is designed to beginner-friendly with a color-coded thread guide that will help you to avoid tangling up your threads while running them through the machine.

Pinking shears are another incredibly valuable tool to have in your collection when it comes to sewing seams. Pinking shears are scissors that are specially designed to cut the fabric into a zig-zag pattern.
This helps to prevent the fabric from fraying and unraveling up to the stitch line, which will help to keep the fabric looking neater if you’re not planning on finishing the edges. However, for this to work, you need to use the pinking shears correctly.
When using them, you’ll want to cut diagonally across the grain of the fabric. If you cut perpendicular to the grain, then it is more likely to come still unravel over time.

Bias tape is long, stretchy pieces of fabric that are folded so that the raw edges meet in the middle. You can either purchase your bias tape from a fabric store or make it yourself. There are many simple tutorials online that will teach you how to make your own bias tape.
Bias tape can be used for finishing the edges of and covering up seams. It is frequently made with bright colors and patterns, which will help to embellish your clothing further. Many sewers also use bias tape as a trip around the edges of projects such as pillow covers and blankets.

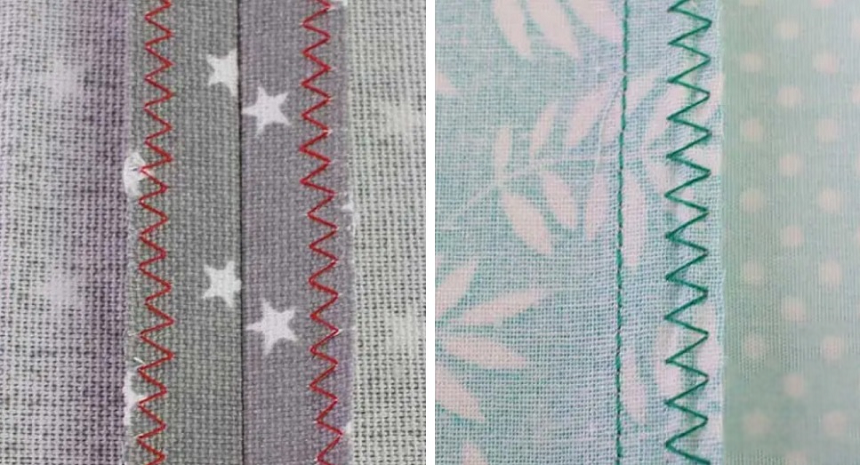
One of the most versatile stitches to have in your repertoire when it comes to sewing seams is the zig-zag stitch. Zig-zag stitches are most commonly used for finishing fabric edges as well as sewing seams in stretchy fabrics.
One of the main benefits of a zig-zag stitch is that it has more of a capacity to stretch than a simple straight stitch. This makes it ideal for sewing seams and hems into stretchy fabrics. If you use a straight stitch to sew a seam in a stretchy fabric, you will be taking away some of its flexibility.
If the fabric is stretchy and the seam is rigid, the chances of the seam ripping out are much greater. If you use a zig-zag stitch that will keep the flexibility of the fabric, then you won’t have as much of an issue with this.

The final section of this article will go over the different types of seam finishes. The way that you finish a seam significantly impacts the way your seam will appear and how durable it is.
A stitched and pinked seam is a very simple option if you do not want to spend a lot of time finishing your seam. The first thing that you’ll do is trim your seam allowances with pinking shears; this will cut them into a zig-zag pattern that makes them fray resistant.
Once that is done, you’ll add a line of stitching to the edge of the seam allowance which will make sure that even if it begins to fray, the fraying will stop at the line of stitches.
With a herringbone seam finish, you will sew the edge of the seam with a herringbone stitch. A herringbone stitch is done using a criss-cross stitch where one side of the stitch is closer together than the other.
This stitch is also sometimes used as a decorative stitch to add an extra flair to your garments.
An overcast seam finish is done using the overcast stitch. The overcast stitch wraps around the edges of the fabric with every stitch, going back to a base stitch line near the edge. This will keep the fabric from unraveling down to the actual seam of the garment.
In a net-bound seam finish, the sewer will take extra fabric and fold that fabric around the seam of the garment. They will then sew the extra fabric into place, covering and protecting the seam.
This type of seam finish is best used with garments sewn from fragile fabrics that are prone to ripping. The addition of the fabric over the seam will help to support the seam and protect it from coming loose over time.
A clean finish edge is very easy to sew with a regular sewing machine and is a great, secure alternative to a serger stitch which requires a specialized sewing machine.
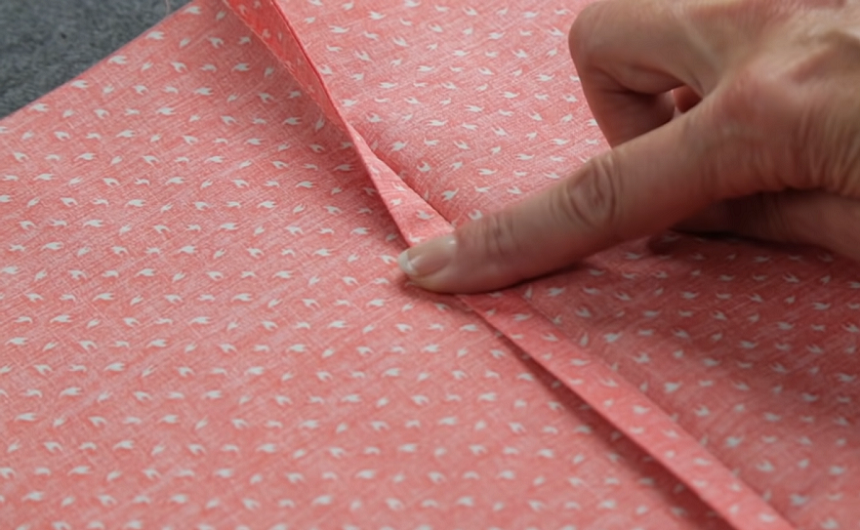
To sew a clean finish edge, you’ll want to sew a simple seam, then leave your fabric allowances the same length on both sides. After they are the same length, you’ll fold each one down to half its length, tucking the raw edge beneath the allowance toward the fabric.
Once they are tucked to the same length, you’ll use pins to hold the fabric allowances to fold together. Then use your sewing machine to sew a line of stitches down the middle of this fold. Repeat this one on both sides of the seam. Once this is done, the fabric will not be able to come unravel.
Although it will not create the most subtle seam, the result is neat and durable.
In conclusion, there are many different types of seams that you can use in your sewing. It is important to have as many of these seams in your repertoire as possible because, although they are all seams, they have several key differences and are not interchangeable.
Each type of seam will be ideal for a different type of fabric and different projects. For example, net-bound seams are the best for very fragile fabric, while a counter seam should only be used when dealing with very heavy and rigid fabric.