Whether you’re looking to improve your sewing skills or you simply want to start learning some basic sewing, you’ve got to know all of the parts of the process to be successful. Learning how to change a sewing machine needle is a task that is daunting to some and can be hard to learn as well. Every sewing machine is different, but the basic concepts will remain the same across the board. You simply need to know where to look and the signs to look for. You can also refer to your user’s manual for any specific parts or details related to your machine.
In this guide, we will walk you through how to replace a sewing machine needle. We will walk you through the different steps of the process and share some tips on ensuring you choose the right needle for your task. Take a look below to learn more!
The first step is to understand when you need to change a needle first. In reality, you might be changing needles regularly to accommodate different types of material or even different projects that you’re doing. If you’re just looking for basic use and not sewing all the time, you will change the needle when it starts to show signs of dullness. Look for the indicators. These are the obvious signs to change the needle.
These are signs that the needle you are working with likely isn’t going to do a good job or isn’t going to hold up much longer. Most of the time, you can use a needle for a long time until you hit one of these issues, but you might also prefer a new needle with new projects. If you’re noticing signs of the stitching not looking neat or smooth, change the needle and see if this makes a difference.
Otherwise, you can also change needles for your different projects based on the needle that you need for that particular fabric.
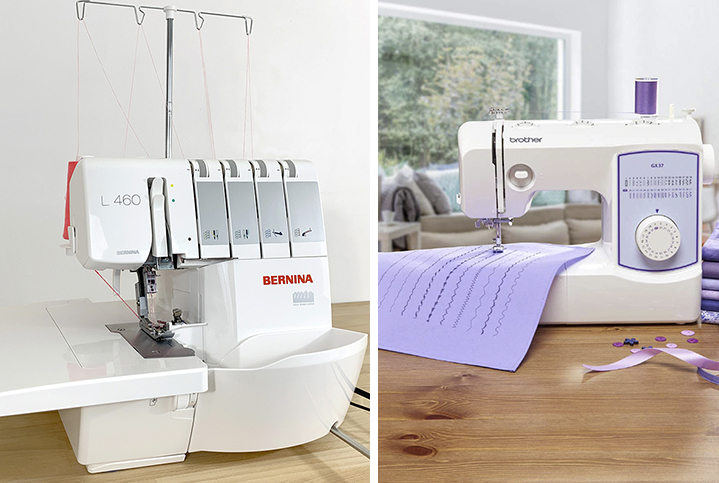
Regardless of your reason for changing the needle, you need to know the various steps from start to finish. Of course, you need first to remove the old needle and then insert the new needle. Remember that different machines have different designs, so if you’re looking specifically for how to change a needle on a Singer sewing machine or to change a needle on a Brother sewing machine, you might also need to refer to your owner’s manual for specific details.
Now, let’s go through the different parts of the process.
The first step is to learn how to remove the needle that is already in place. This includes proper disposal Trusted Source Sewing Needle and Pins Disposal Tip Needlepointers.com This is a tip for how to dispose of broken and bent sewing needles and pins. www.needlepointers.com of your needle. It’s never a good idea to just toss it in the trash can. Instead, dispose of it in a contained manner.
Follow these steps to remove your sewing machine needle.
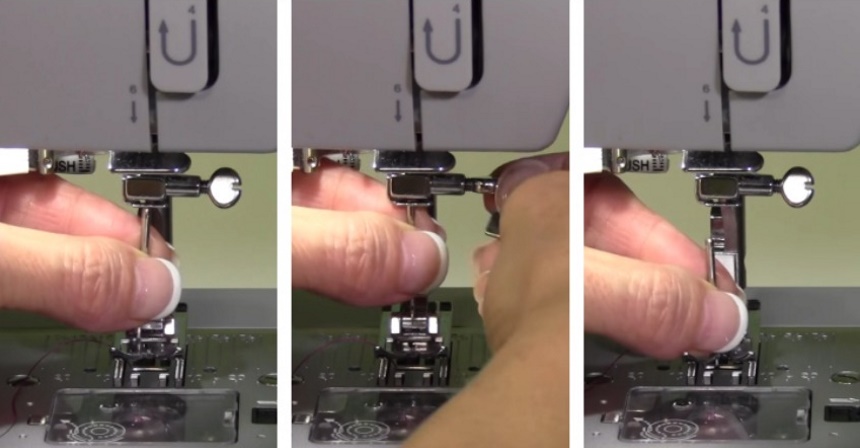
If you struggle to get the needle out, you can also remove the presser foot. Some people prefer to remove the presser foot before starting, just to have more working room. As you remove the needle, take a look at the top end, where there is a flat side. Mentally take note of whether that flat side was facing forwards or backward. This will help when installing the new needle.
Now, you can put in the new needle. There is more than one method for this, so let’s break it down between the different methods below.
You can put a needle in a sewing machine using your fingers, but some people feel like their fingers are too clumsy or large to see well. It’s up to you and what you are comfortable with!
With your fingers, you simply make sure the flat part of the needle is facing the right direction and insert the needle up into the space as far as you can. Tighten the screw that you loosened when you replaced the needle.
VERY IMPORTANT: Make sure you get that screw as tight as possible to avoid wobbling Trusted Source 4 sewing mistakes that lead to loose stitches Singer Hong Kong SSMC Ltd. Wrong threading methods, needle fabric thread combination, and tension could lead to loose stitches. Read on to find out solutions. singer.com.hk !
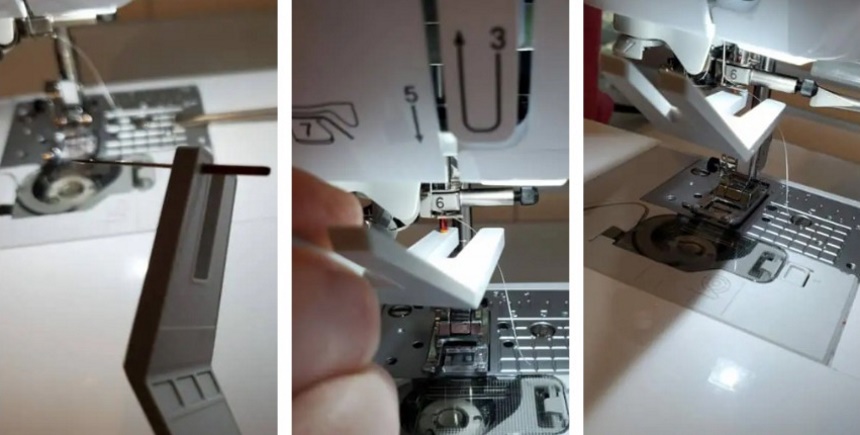
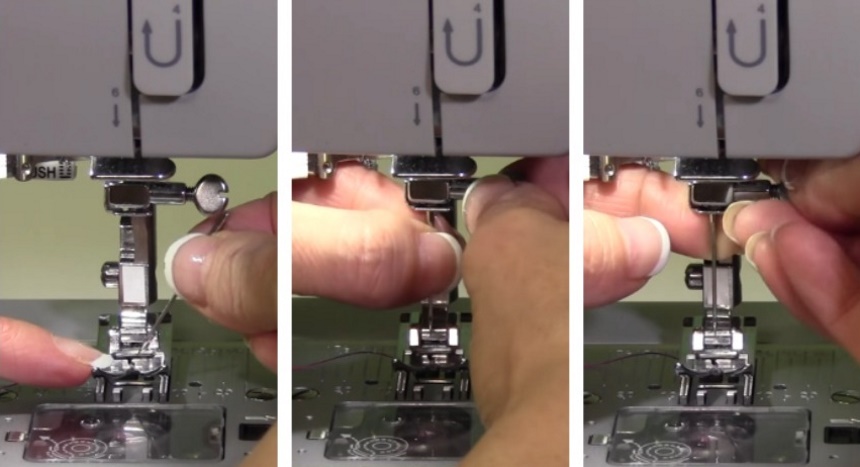
Next, you could also use a clearance plate to change a sewing machine needle. Some sewing machines come with these plates, and it’s an easy tool that keeps your fingers out of the way. The tool holds the needle steady and in place for you.
Put the needle into the clearance plate. It should be snug in the tool. Make sure your needle and clearance plate are facing the right direction, and then use the plate to insert the head of the needle into the machine. When in place, push the needle up as far as it will go. Then, tighten your clamp as tight as possible, and you are ready to go!
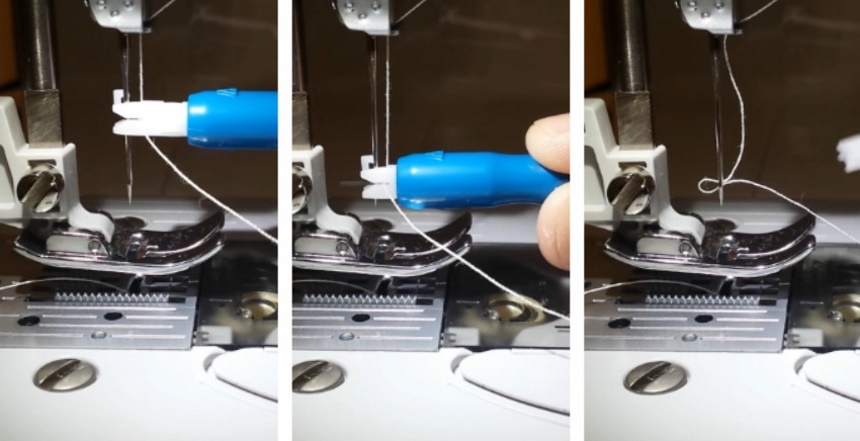
Since not every sewing machine comes with a clearance plate, you could also just use a Dritz needle inserter and threader. These little tools are pretty handy, and they help you insert the needle as well as thread the needle.
It’s similar to a clearance plate. Just put the needle in the tool, push it up as far it will go in the machine, and then tighten your clamp tightly.
Once you’ve got the needle in place, you need to check it before use. Take a look at it to make sure it’s tightly secured and that it’s in good condition to use.
Now, you need to set the machine back up for use. If you did remove the presser foot, you would need to put it back in place. Put away any tools that you used, and dispose of the old needle. Now, you can plug it back in and power up the machine.
You will need to thread your needle with the appropriate thread before you can sew. If threading is a challenge for you, most sewers recommend a tool like this needle threader to help make it much quicker and easier.
There are several different types of needles to choose from. The fabric that you are working with might make a big difference in finding the best sewing machine needles to use. Take a look at choosing the right needle for these fabrics.
There are needles that are made specifically for leather. Or, you might simply use a thick needle with an extremely sharp point. The most common choice is a triangular point needle because this can make it through thick, hard leather and create clean holes.
The needle for jeans Trusted Source What Size Needle Should You Use to Hem Those Jeans? Zero Guesswork Sewing You should choose the needle size according to the weight of the fabric you’ll be sewing. Read on to learn more. www.zeroguessworksewing.com might depend on your jeans. For example, jeans with stretch will likely need a stretch and ball joint needle to do the best work. Use a denim needle or a needle with an extra sharp point that can penetrate denim without tearing.’
Quilting requires delicacy. You might be able to use a standard needle, but it depends on the quilting pattern. These assorted quilting needles might help you be prepared for any situation. However, the best results typically come from a quilting needle that uses a very slim and tapered point to stitch. The needle should still have a strong shaft for penetrating the various quilting layers.
A ballpoint needle can be used for different materials, like the stretchy denim we mentioned above. You can use this needle for any knit materials that are stretchy or looser in nature. This way, the needle is gentle but won’t separate the threads of material.
This is the general all-purpose needle that you can use for the majority of basic projects. Things like mending, patterns, and projects that don’t require specialized approaches.
Much like the name suggests, use stretch needles to stretch things. This is especially true for silk, lycra, elastic, and similar materials.
Don’t intimidate when you need to change your needle. While messing with all the parts and pieces might seem challenging, it’s really not too hard to learn how to change sewing machine needles. If you struggle using your fingers, invest in a quality tool like the ones we mentioned in this guide. You will find that you can change your needle pretty quickly. Just always make sure you get it tight and secure so that it doesn’t irritate your materials by wobbling.
Choose the right type of needle for the materials you are working with, and learn to keep spare needles on hand just in case you need them. Good luck with your next project!