How to Remove Embroidery With Backing: Simple Tips and Tools

In the article, there are tips on removing embroidery with backing, tools needed for that, and a guide for each method.
By
Chloe Faber
Chloe Faber
Designer
Chloe is not just a fashion designer - she’s an artist, and her personal blog is her canvas. BTW, check it out to get daily inspiration from her vibrant style! Chloe activ read more
Last updated: August 13, 2023
SewingLab is reader-supported. We may earn a commission through products purchased using links on this page. Learn more about our process here

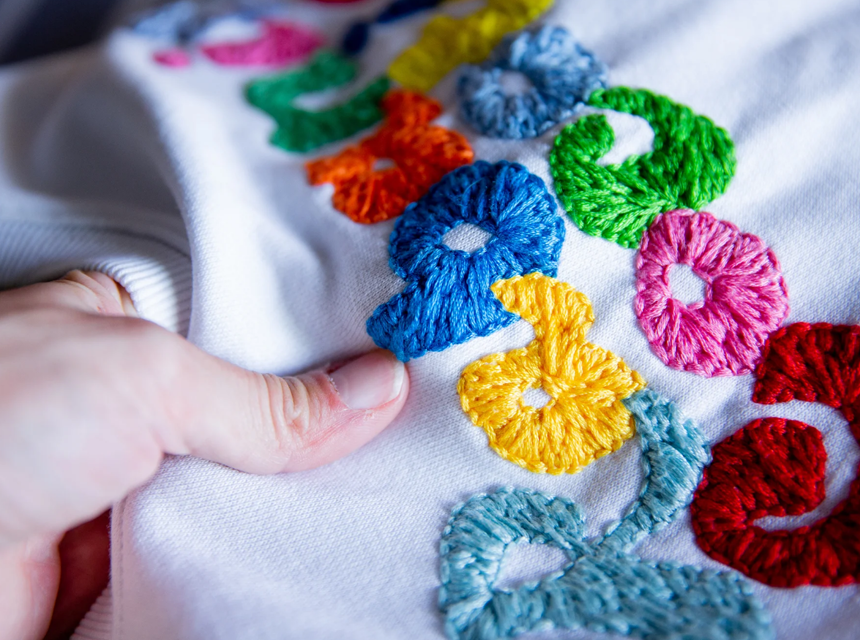
Backing serves as a form of stabilizer for fabrics when it is being embroidered. It serves as a type of support for the fabric and embroidery stitches, resulting in beautiful needlework and longer-lasting stitches.

There are many circumstances in which an embroidery may need to be removed. It might be the result of stitching errors or a change of heart over the desired design. It can be challenging to remove embroidered stitches without causing harm to the cloth, but it is possible. This article explains how to remove embroidery with backing without harming the fabric (because the backing is what reinforces the stitches) regardless of if it was hand sewn or done by a machine. It also lists all the tools required to make the job easier and more neatly completed.

Tips On How To Remove Embroidery With Backing

Before you begin removing embroidery stitches with backing, make sure you have the right equipment and know how to use them. As a result, the cloth will experience little or no damage while generating the required results.

Determine the type of backing utilized. This will identify the most effective way for removing embroidery. Tear-away backing is used for thick materials with no stretch, Cutaway backing is used for delicate and stretchy fabrics, water-soluble backing, fusible mesh backing, peel and stick backing for hoop-less embroidery, fleet seal and cover-up backing (both heat-applied backings) are used post embroidery and help with irritation caused by the embroidery coming into contact with the skin. If the backing is water-soluble, soak it in hot water until it dissolves. If the backing is heat-activated, you can remove it with a steam iron.

Use the following instructions for various types of backing:

  • A sharp pair of scissors is essential, as is extreme caution when cutting to avoid harming the fabric.
  • Snip off excess embroidery backing around the outside of the pattern using scissors.
  • Then, carefully peel out the embroidery backing, being careful not to strain on the stitches.
  • Stop and snip the region of the backing with the resistance if you encounter resistance while peeling the backing.
  • After removing the backing, use a lint roller or lint brush to gently brush away any loose embroidery threads.
  • Finally, iron the affected region to remove creases.

Patience and concentration are also required while removing embroidery stitches with backing, as the backing must be removed first. The length of time spent, and level of attention required may vary depending on the type and size of embroidery being removed, since in some cases the use of a magnifying lens may be required.

If the goal is to protect the fabric, removing the backing and needlework should be done slowly.

Tools for Removing Embroidery

There are different tools for removing embroidery according to some of the best embroidery books. However, the selection or combination of the said tools is largely dependent on the type of embroidery to be removed. Some of the tools include seam ripper, tweezers, manual razor, stitch eraser, electric shakers, lint roller or lint brush, magnifying glass, and embroidery scissors.

Manual razor

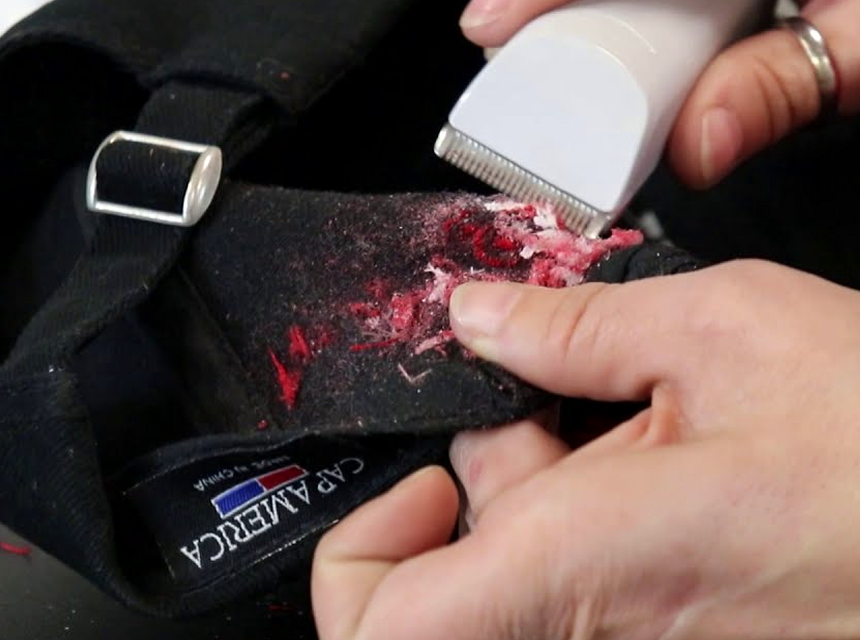
Manual razors function similarly to stitch erasers or electric shavers, but the latter is faster. Plastic razors or single-blade razors are substantially more affordable and can be obtained at almost any store.

When using a manual razor, you should do the following:

  • Place the garment inside out on a flat surface to work on. It is critical to keep the garment taut and on a hard, flat surface at all times. This prevents you from accidentally shaving some of the clothing.
  • Begin by removing the backing. With the razor blade, make a small cut on the backing and peel it off with your hands. When the backing is removed, the bobbin stitches used to secure the embroidery to the garment become visible. The best sewing and embroidery machines make these stitches to keep the needlework in place.
  • Bring the razor to the bobbin stitch and gently scrape it against the stitches until they come off. To make your job easier, make sure the razor is sharp. Repeat this method for the whole embroidery design until you only have cut-off stitches on the side of the garment you’re working on.
  • Then, right side up, turn the garment. At this time, the embroidery design should have begun to fall out. Remove the threads that form the design. A lint roller can be used to remove any remaining threads from the garment.
  • Repeat the process for the remaining areas of the garment until it is clear of embroidery.

Stitch eraser

Stitch erasers like the Peggy’s Stitch Eraser 3 are electrical or battery-powered stitch removers that look like an electric razor or trimmer. Tweezers and/or a lint brush, as well as a flat working surface, are also required when using the stitch eraser.

How to Use the Stitch Eraser:

  • Make sure you’re working on a flat surface. Turn the garment inside out to see the entire embroidery design.
  • Make sure the clothing is taut. To stretch the clothing as tightly as possible, use hoops, pegs, or pins. This allows the threads on the embroidery pattern and the backing to be seen.
  • Tear apart the backing of the needlework using tweezers and your fingers. You can use tweezers to remove the initial section and then proceed by hand.
  • Remove the stitches by turning the garment the right way out. When using the stitch eraser, you may need to use the MH magnifying glass to enhance visualization and grab the correct stitches.
  • Set the stitch eraser to the bobbin stitch on the embroidered pattern. Bring the stitch eraser to this stitch to remove it. Check that the garment is still tightly fastened in position to allow for simple movement of the stitch eraser. Remove all of the stitches that hold the embroidery design to the garment.
  • It can be difficult to discern the stitches when working on professional-level embroidery. Aim for the shaved-off parts and gently tug on the threads.
  • If the thread is difficult to move and you find resistance, stop pulling and try another thread. Pulling too hard on any unloosened threads risks ruining the garment’s fabric.
  • Reapply the embroidery eraser on the back. Sometimes the embroidery eraser does not cut all of the threads on the first pass. Turn the garment inside out and, one inch at a time, run the embroidery eraser over the remaining threads. Then, flip the clothing the right way out and use tweezers to remove the threads.
  • Repeat until all of the embroideries have been removed.
  • Then, using a lint roller, go over the outfit. Use a lint roller to remove any thread remnants or debris from both sides of the fabric.
  • When using the stitch eraser, exercise caution. Maintain a safe distance between your hands and the clothing you’re working on. This way, you won’t damage yourself while working with it because of its sharp razors.

Seam ripper

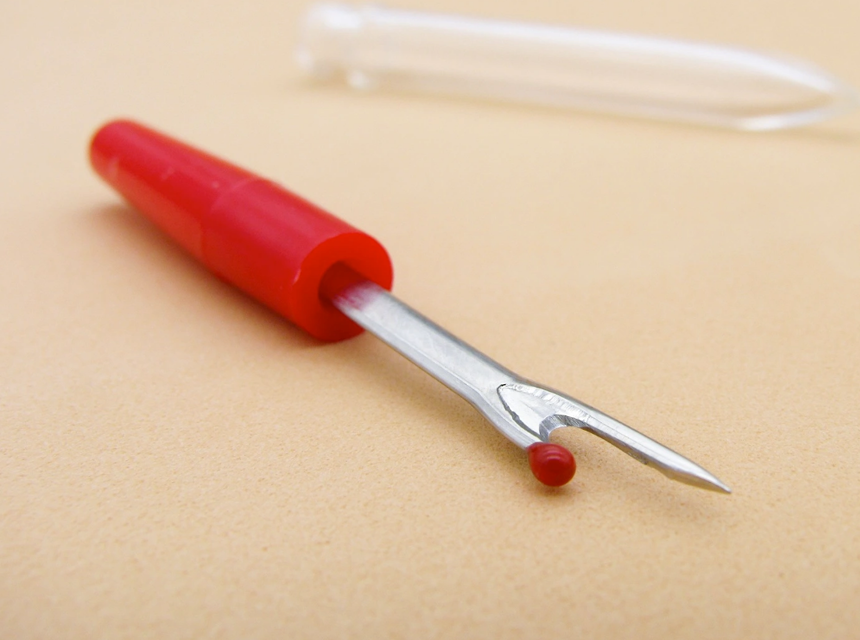
They have sharp pointy tips and are formed like claws. It includes a plastic handle and a forked metal head, with one prong longer than the other to make it easier to slide under the stitches. Tweezers, a lint roller, and a magnifying lens are all required when employing a seam ripper.

When using a seam ripper, follow these steps:

  • Turn the shirt inside out to see the embroidery from the inside.
  • For how to remove the embroidery backing, make a small cut with tweezers and then remove the remainder with your fingertips. If it doesn’t come off easily with your fingers, carefully pull off the backing with a seam ripper. Take care not to rip your garments while doing so. The embroidery stitches become evident after the backing is removed. They are usually quite small, which necessitates the use of a seam ripper.
  • Take the seam ripper and slide the forked end’s long prong under a tiny part of the pattern.
  • Slide the point beneath approximately five or six stitches until the first stitch reaches the fork’s neck. This section of the seam ripper is razor-sharp and designed to sever threads.
  • When you reach this spot, push the seam ripper forward firmly, cutting through the embroidered stitches. Try to be hard but gentle when cutting through the stitches to avoid damaging the garment or any other threads that you wish to stay in place. This stage is determined by the design you are working with. Hand-stitched embroidery allows you to just snip a handful of stitches, but most machine embroidery patterns allow you to continue to run your seam ripper beneath the lines of stitches, cutting them as you go.
  • Repeat this technique until you have cut through all of the embroidered stitches.
  • Turn the garment right side out. Gently pull at the ripped stitches with tweezers, eliminating the threads.
  • This will remove both the embroidery and the damaged threads. If you’re having trouble determining which stitches have been torn, use the magnifying lens to identify the broken threads and pull them out. Until the garment is clear of embroidery.
  • Use a lint roller to go over everything. Even after you’ve done extracting threads with a tweezer, there will almost certainly be some stray threads and debris laying around. Pick these up by passing a lint roller over the clothing on both sides.

Electric shakers

This device vibrates the embroidery off of the fabric. It is a quick and simple approach that doesn’t require any specific skills or experience.

Using an electric shaker, proceed as follows:

  • To reveal the embroidery background, turn the item inside out. To make it easier to reach and shave off the stitches of the embroidery design, pull the garment taut.
  • Using a tweezer and your fingers, remove the backing. If you encounter any resistance when using your fingers, make a small slit in the region with a tweezer before attempting to remove the remaining backing.
  • You will need embroidery in one hand and a shaker in the other. Place the shaker on the embroidery you have in your other hand and wrap the fabric around the shaker. Then turn on the shaker to loosen the embroidery stitches.
  • The fabric is twisted and removed with your fingers when all the stitches have been removed. To clean the surface of the clothing, use lint rollers or duct tape.

Magnifying glass

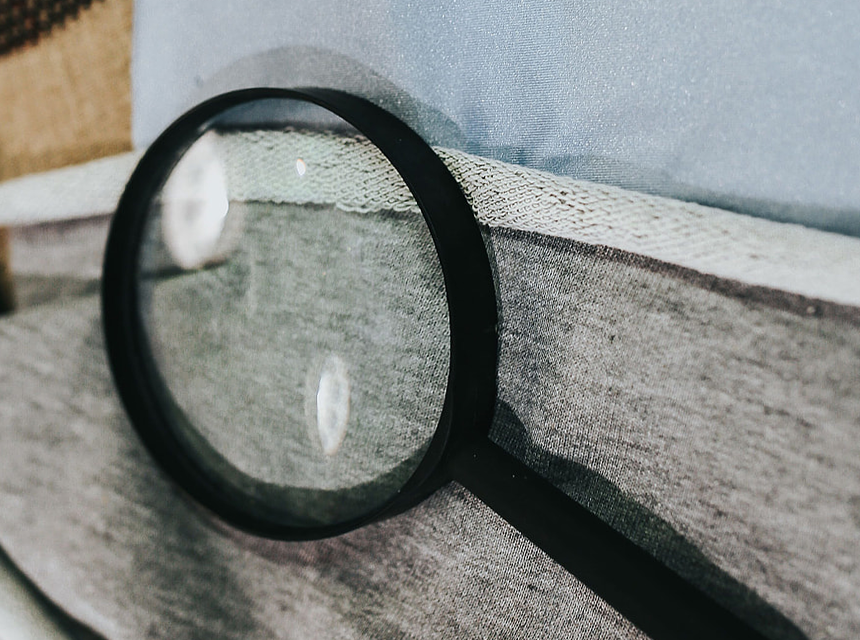
Removing embroidery stitches and backing can be a very delicate job, especially with the thinnest and smallest threads and stitches. A small magnifying glass can give you just that little helping hand when you need to zoom in some more. It is not a must when removing embroidery, but it sure is a great tool to have. Furthermore, some embroidery threads are difficult to recognize with the naked eye, causing you to unintentionally pull the wrong thread and accomplish nothing.

Lint brush Or Lint roller

This is essentially a handle with a roll of adhesive paper attached to one end. It is utilized to clean up your workspace and get rid of all the tiny threads, materials, strings, and other nagging items. This tool is quite important when it comes to removing embroidery since it can help you clear the embroidery you’re working on and remove all of the threads that have already been severed but are still attached to the garment due to static electricity.

Duct tape or adhesive tape

If you don’t have a lint roller, put some duct tape or adhesive tape around your hand with the sticky side facing out to obtain a similar clean-up outcome. Then rub the fabric with your hand to remove any loose threads or debris. Simply put the tape to the back of the embroidery and take it off after the bobbin stitches have been removed. It may take some energy to get the tape started, but once it is, the embroidery should come off easily. If any stubborn portions of embroidery remain, gently remove all the stitches and fuzzy threads with tweezers or a needle.

Tweezers

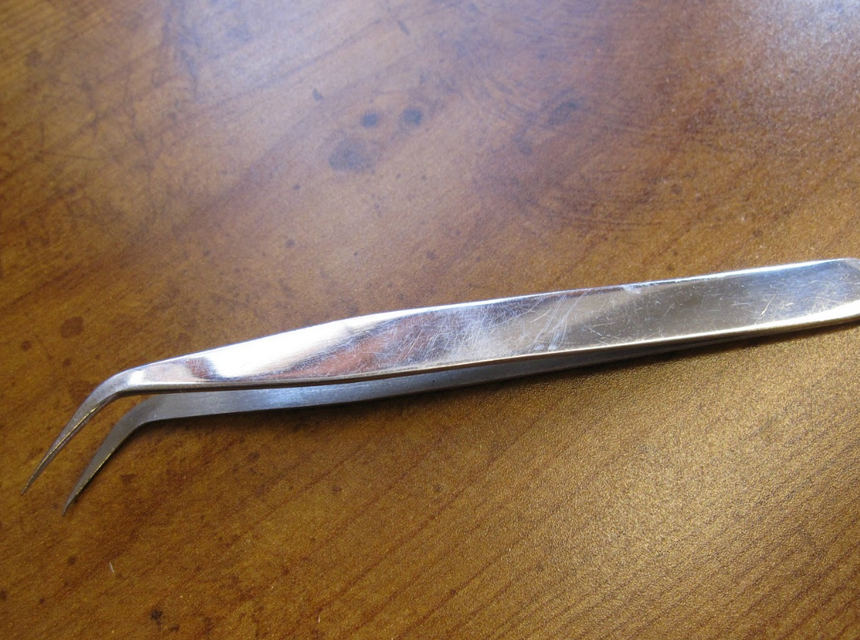
This tool is constructed of two thin metal pieces that are joined at the ends. When removing the backing with tweezers, gently pull up the backing while being careful not to damage the cloth. Tweezers are also useful for removing any stray threads from the front of the embroidery.

FAQ

Will removing embroidery leave holes?

Removing embroidery will leave holes when too much force or pressure is applied to remove the stitches and threads from the fabric. But if you are careful enough, it should not leave any holes.

What is the easiest way to remove embroidery?

One of the easiest ways of removing embroidery is by using a stitch eraser. It is very effective and consumes less time than the other methods available.

How do you remove embroidery backing from a jacket?

You must first flip your jacket inside out before removing the backing. After that, you can cut through the bobbin stitches using a seam ripper or a manual razor. This should aid in the removal of the needlework on the front. Finish with tweezers and a lint brush or roller.

Final Thoughts

The process of removing embroidery with backing calls for focus and patience. It is crucial to choose an embroidery tool that is appropriate for the stitching style and fabric size. You can accomplish a neat job of removing embroidery from your fabrics if you know how to use the tools and followed the instructions on how to remove embroidery with backing with any tool of your choosing.

Leave a comment

Your email address will not be published. Required fields are marked *